Как использовать Video to Video ИИ
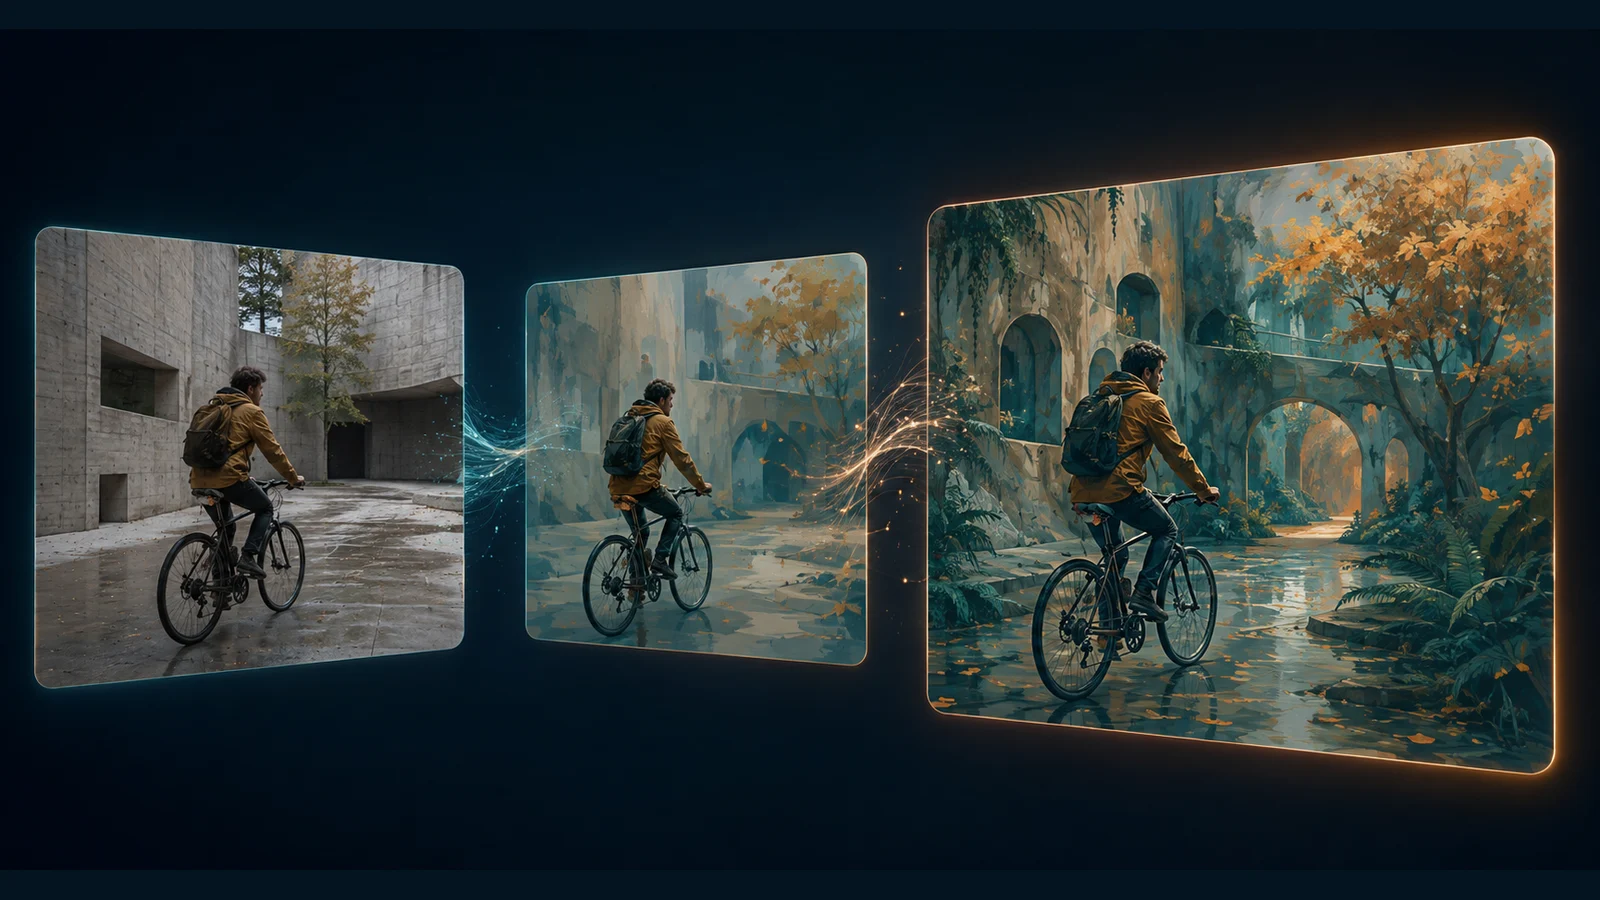
Video to Video ИИ создаёт новую версию готового видео. Выберите понятный план, разделите то, что нужно сохранить и изменить, затем проверьте весь результат. В руководстве — подготовка, четыре шаблона промптов и разбор проблем. Обложка иллюстрирует процесс.
LumiYingОбновлено
Выберите способ под ваш исходник
Редактирование клипа, заимствование его движения и анимация изображения начинаются с разных материалов.
Подготовьте исходник и уберите противоречия
Прежде чем добавлять указания, убедитесь, что сохраняемые детали хорошо видны в источнике.
Выберите непрерывный план
Предпочитайте понятное действие без резких склеек, сильного размытия и долгих перекрытий объекта. Длинные записи заранее разделите на планы в видеоредакторе.
Используйте формулу сохранения и изменения
Пишите: источник + сохраняемые детали + одно изменение + визуальные условия. Например, оставьте направление шага и камеру, а свет смените на вечерний.
Дайте изображению одну роль
Если добавляете референс, объясните, задаёт ли он стиль, предмет или внешность. Не создавайте противоречий с движением и камерой исходного видео.
Уменьшайте мерцание и смену фактуры
Выберите стабильный исходник, упростите текстуры и удалите несовместимые указания света. Сравнивайте одинаковые моменты обеих версий.
Найдите причину изменения формы
Посмотрите, где лицо, рука или товар скрываются либо размываются. Возьмите более чёткий отрезок, назовите важные детали и сузьте изменение.
Разделяйте камеру и движение объекта
Панорама влево противоречит просьбе об облёте вправо. Сначала явно сохраните исходную камеру и меняйте только визуальную обработку.
Редактирование видео за четыре шага
Используйте один исходник и сохраняйте промпты, чтобы сравнивать версии.
Проверьте и загрузите источник
Определите действие, движение камеры, композицию и ключевую узнаваемую деталь. Откройте Video to Video и добавьте этот единственный клип.
Опишите одно видимое изменение
Используйте показанную @-метку, две-три сохраняемые детали и одну правку. Избегайте расплывчатых и несовместимых указаний.
Проверьте режим редактирования
Посмотрите модель и требования к входным файлам. Здесь длительность и композиция зависят от обработки источника моделью, а не от дополнительных ручных настроек.
Проверьте и измените одну переменную
Сравните начало, середину и конец, затем просмотрите всё видео для оценки тайминга и мерцания. Меняйте либо участок исходника, либо одно указание, но не оба сразу.
Четыре шаблона промптов Video to Video
Замените @Video1 на метку загруженного файла. Это заготовки для адаптации, а не гарантии результата.
Мягкая смена освещения
Отредактируй @Video1. Сохрани движения танцовщицы, терракотовый костюм, положение камеры и студию. Измени только свет на мягкий лунный с тёплой контровой подсветкой. Сохрани естественный тон кожи и согласованные тени.
Для смены настроения, когда движение уже подходит.
Рисованный стиль
Преобразуй @Video1 в рисованную гуашью анимацию с бирюзовой и охристой палитрой. Сохрани направление шага, рыжеватое пальто, сумку, прибрежную тропу и кадрирование. Поддерживай одинаковую фактуру мазков.
Укажите одну технику и небольшую палитру.
Замена окружения
Отредактируй @Video1. Сохрани кобальтовый чайник, ручку из орехового дерева, носик, каменную подставку и исходную камеру. Замени студию туманным лесом на рассвете. Согласуй свет и сохрани опору чайника на подставку.
Проверьте края, отражения и контактные тени.
Вариант товара
Отредактируй @Video1. Сохрани силуэт обуви, подошву, строчки, положение и исходное медленное движение камеры. Измени только серую ткань верха на приглушённый тёмно-зелёный цвет. Сохрани фактуру и не добавляй текст или аксессуары.
Ограниченная правка упрощает поиск изменений геометрии.
Выберите подходящий процесс ИИ-видео
Перейдите к генерации или сравните более простой способ ввода и связанные руководства.
ИИ-генератор Video to Video
Преобразуйте готовое видео с помощью ИИ. Загрузите клип, укажите, что сохранить и изменить, и попробуйте новый стиль, освещение или окружение.
Как заставить фото танцевать с ИИ
Узнайте, как заставить фото танцевать с ИИ: выбор изображения, описание движений, видеообразец и три практических промпта для первого ролика.
Как продлить видео с помощью ИИ
Как продлить видео с ИИ: подготовка исходника, промпт продолжения, выбор настроек и проверка результата на практических примерах.
Как создавать ИИ-видео по референсам
Научитесь работать с изображениями, видео, аудио, ролями @, готовыми промптами и исправлением ошибок.
Image to Video AI
Оживите одно изображение, если нужен только первый кадр.
ИИ-генератор видео из текста
Превратите текстовый промпт в ИИ-видео. Опишите одну сцену, выберите модель, соотношение сторон, разрешение и длительность, а затем перенесите настройки в полный генератор LumiYing.
Модели ИИ
Посмотрите доступные модели.
Цены
Посмотрите доступные тарифы.
Вопросы о процессе
Как изменить стиль видео?
Загрузите чёткий клип, задайте технику и палитру, назовите сохраняемые действие и композицию. Проверьте весь результат и уточните одно указание.
Какой исходник лучше?
Непрерывный план с видимым объектом и понятным движением. Избегайте сильного размытия, склеек и долгих перекрытий.
Что включить в промпт?
Источник, сохраняемые детали, одно видимое изменение и важные ограничения. Разделяйте камеру и действие объекта.
Почему результат мерцает?
Могут влиять нестабильные детали, сложные фактуры и противоречивые указания стиля или света. Упростите правку и сравните одинаковые моменты.
Почему меняется форма лица или товара?
Размытие, перекрытия и большие преобразования мешают сохранять детали. Используйте более чёткий участок и уменьшите конфликтующие референсы и масштаб правки.
Можно редактировать длинное видео?
Соблюдайте текущий лимит загрузки. Для длинной работы подготовьте отдельные планы, отредактируйте и проверьте их, затем соберите принятые клипы в видеоредакторе.
Когда выбрать Reference to Video?
Когда источник должен задать лишь движение или камеру для новой сцены. Для редактирования существующего плана используйте Video to Video.
Попробуйте одну ясную правку
Откройте инструмент с подготовленным клипом и коротким промптом о сохранении и изменении.