First Frame to Last Frame AI: A Practical Guide

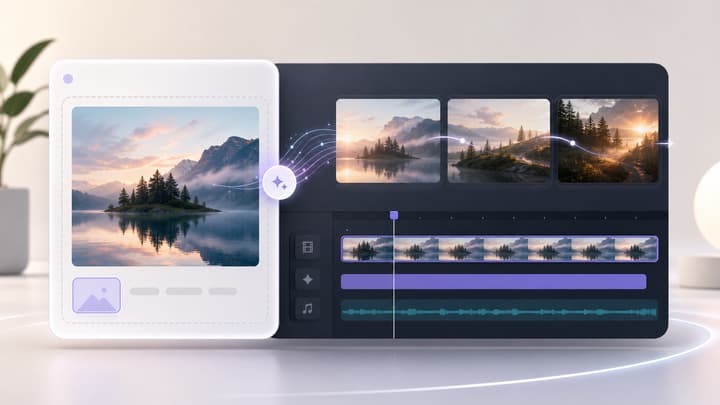
To make an AI video with first and last frames, upload the opening image and the ending image separately, then describe what happens between them. Choose a supported model and a short duration, generate, and compare the beginning, middle and end with your inputs. The two frames set the destination; the prompt explains the journey. They guide the model but do not guarantee an exact pixel match. The last frame is optional in the tool; use only a first frame if you do not need a specific ending.

LumiYingUpdated

Build a transition you can evaluate

Start with a small change between two clear images. A simpler first attempt makes problems easier to locate.

  1. Step 01 Choose compatible endpoints

    Use the same aspect ratio and similar subject size in both images. For a natural move, keep the person, clothing, object and environment consistent. A front and rear view needs a plausible route around the subject. Two unrelated rooms do not describe a real path; use an intentional transition or edit separate shots together instead.

  2. Step 02 State the change before writing the prompt

    Decide whether the subject moves, the camera moves or the scene transforms. For a smile, keep the head and camera still. For an orbit, keep the object stable and describe the camera path. For an empty-to-furnished room, call it a designed transformation. Do not ask the same feature to stay unchanged and transform at once.

  3. Step 03 Write the middle, not a second image description

    Use this structure: subject action + camera movement + details to preserve + final pose or composition. For the coastal pair below, ask the camera to travel along the coast toward the final view while retaining the skyline. For the vehicle, explain how the camera reaches the rear angle while the car continues forward. The suggested prompts load with the matching pair.

  4. Step 04 Upload, select settings and check the quote

    For this two-frame exercise, put the opening image in First frame and the destination in Last frame. The tool also works with the last frame empty if you do not need a specific ending. Start with 5 seconds where offered and match the output ratio to the inputs. A large viewpoint change may need more time or a closer endpoint. After switching models, recheck duration, aspect ratio, image limits and the credit quote. Output is 720p.

  5. Step 05 Inspect three parts of the result

    Pause at the start, halfway through and at the end. Compare the subject's identity and the placement of major edges with both references. Then play at normal speed to judge acceleration, jumps and unnatural pauses. The public demos below illustrate what to inspect. When you submit these inputs, your selected model and settings produce a new result.

  6. Step 06 Change the cause, then finish the clip

    Use Re-edit to restore both frames. If the object warps, reduce the angle between views; if the motion rushes, simplify it or choose a longer supported duration. Change one variable per retry and check the new quote. Download an accepted take and trim or assemble it in your editor. For a loop, compare motion on both sides of the seam, not only the last still image.

Make three decisions before generating

Start with a small change between two clear images. A simpler first attempt makes problems easier to locate.

Make three decisions before generating

Natural motion or transformation
Keep the same subject for movement; name deliberate transformations.
The model needs to know whether a difference is an intended change or something to preserve.
Duration
Begin with one small action over 5 seconds, or the model's offered duration.
More seconds may help a larger move, but cannot make incompatible images physically consistent.
Framing
Use matching input proportions and a supported output ratio.
A different crop can hide the very detail you intended the last frame to control.

Watch the movement between two frames

Compare these public transition demos with their paired inputs. The prompts below are suggested briefs to try with your selected model.

A coastal camera move

Try 5s · 16:9. The prompt specifies a camera path along the coast. Watch the shoreline, mountain silhouette and building edges through the middle of the clip; a convincing final view can still hide a jump or warped geometry.

First frame
Last frame
Transition demo
Suggested prompt

Move the aerial camera smoothly along the coast from the first viewpoint to the final viewpoint. Preserve the shoreline, buildings and mountain silhouette. Keep the horizon level and the evening light consistent. One continuous move without cuts.
Load both frames and prompt

Follow a moving vehicle

Try 5s · 16:9. This front-to-rear camera move is a harder case. Compare the roof, body and wheels in both inputs before generating, then track them through the result. If the vehicle designs differ, choose a matching pair; asking to preserve the car cannot reconcile incompatible shapes.

First frame
Last frame
Transition demo
Suggested prompt

The green off-road vehicle continues forward along the track. Move the camera smoothly from the front three-quarter viewpoint toward the rear three-quarter viewpoint in the last frame. Keep its body and wheels consistent; maintain continuous forward motion.

Load both frames and prompt

Fix the visible problem

A convincing start and finish can hide distorted intermediate frames. Check faces, hands, wheels and straight edges before using the clip.

Faces or objects melt
The endpoints differ too much in identity, angle or shape.
Choose a closer ending view and simplify the camera path. Preserve only the features shared by both inputs.
A jump replaces the movement
The prompt implies a cut, or the requested route is too large for the duration.
Request one continuous move, remove competing actions and reduce the distance or add supported time.
The last frame drifts
The prompt contradicts the ending pose or crop.
Describe the intended final composition and remove conflicting instructions. Recheck the ending image.
The clip freezes too early
There is little change to distribute across the selected duration.
Shorten the clip or specify a subtle continuous action that reaches the endpoint near the finish.
The loop has a visible seam
Position matches but motion, lighting or timing differs across the cut.
Ask for a return to the same state, then trim and check the seam in an editor.
Frequently asked questions

Frequently asked questions

Is a last frame required?

No. Only the first frame is required. Leave Last frame empty to animate one image, or add a last frame to guide the ending composition.

Which models support this workflow?

The selector lists integrated models with native first and last frame inputs. Available durations and image limits follow your selected model.

Will the output match both frames exactly?

The frames guide the opening and ending composition. Generative models can alter details or miss a precise endpoint, so compare the whole result with your inputs.

Can I use unrelated images?

Yes, for an intentional transformation. Describe that change explicitly. For natural motion, prefer the same subject and setting with a plausible difference in pose or viewpoint.

Can I make a loop?

Use the same image in both slots and describe motion returning to its starting state. Check the seam in an editor; identical input images do not ensure matching motion at the cut.

Does loading an example spend credits?

No. It fills the frames, prompt and suggested settings. Review the current quote before submitting a generation.

From frames to a moving shot

Create frame to video animations with AI. Upload a first frame, add an optional last frame, and choose your prompt, model, duration and aspect ratio.