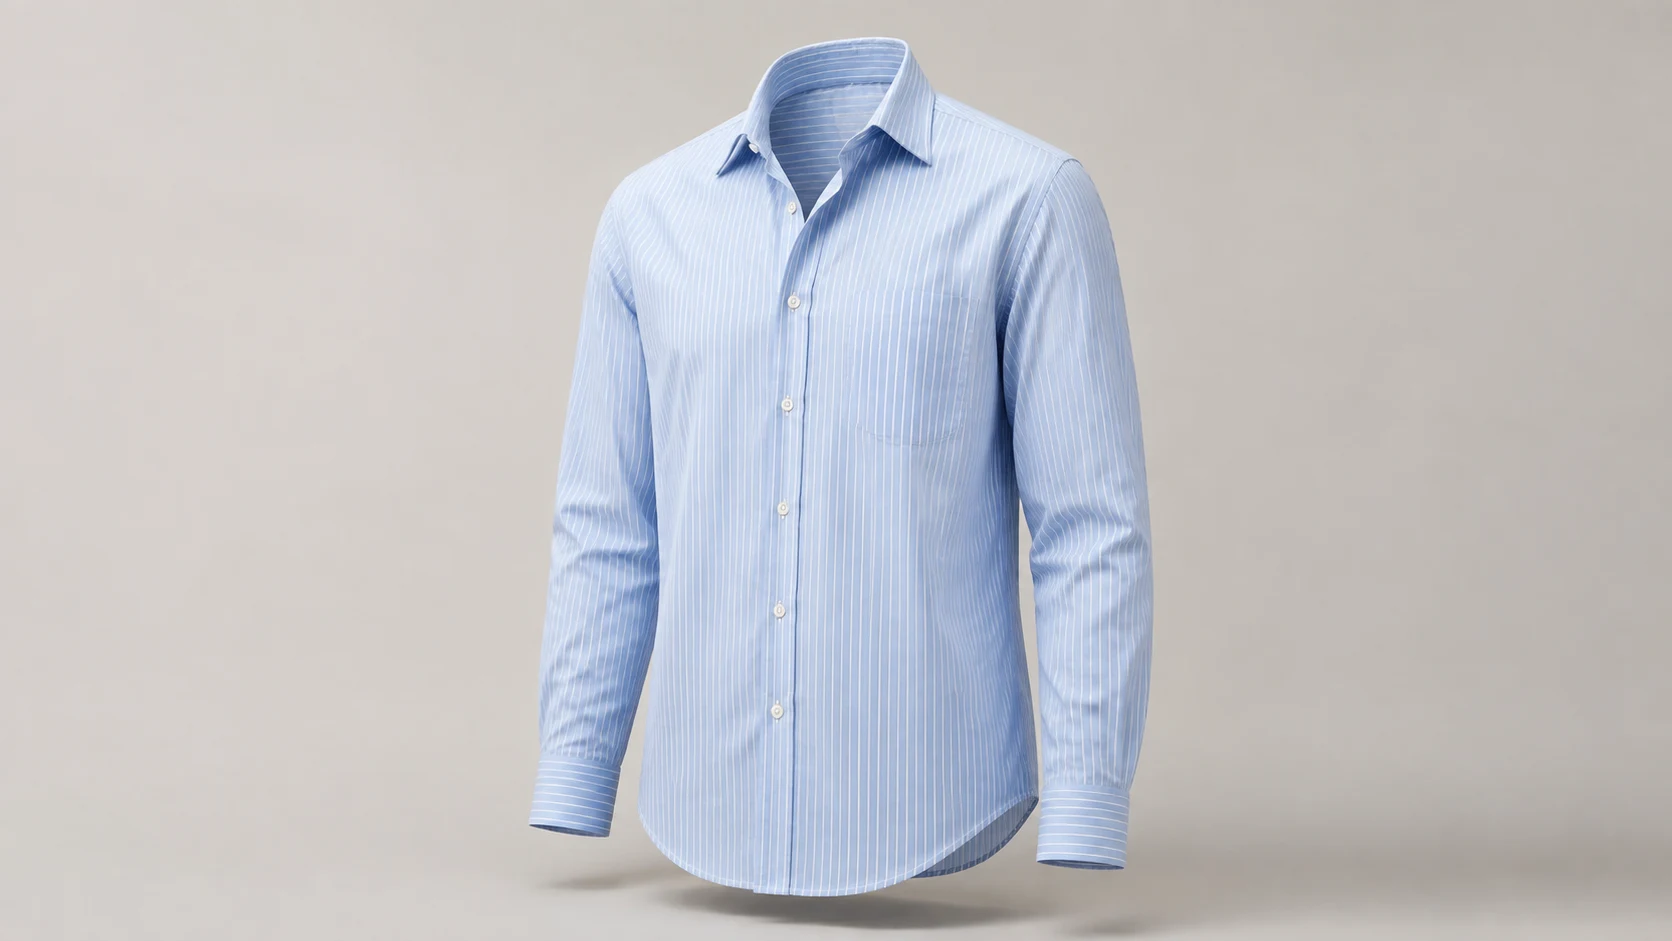
How to Create Ghost Mannequin Photos with AI

Start with a clear garment photo, upload it as an image reference and ask AI to remove the support while adding natural volume. Name the details that must stay the same. Then compare the result against the original before using it in a product listing.

Choose a source that shows the garment clearly

The source image limits what the model can preserve. Photograph missing details instead of asking AI to guess them.

Framing
Front view with the entire garment
Leave space around cuffs and hem; cropped fabric has to be invented.
Lighting
Even light and visible texture
Deep shadows hide seams; strong color casts make the original shade harder to judge.
Hidden details
An extra collar or lining close-up
An additional reference can show the inner fabric or label covered by a hanger or form.

Tell the model what to change and what to keep

A useful ghost mannequin prompt separates the support, garment and presentation.

Change the support and volume

Name the hanger, mannequin or stand to remove. Ask for rounded shoulders, a hollow neckline and natural fabric drape. Avoid adding a person or changing the garment design.

Keep the product specific

List the visible details: ivory cotton, one chest pocket, matching buttons, straight cuffs. Ask for a consistent front view and white background if you need a catalog image.

Create and review your first product image

Start with a clear garment photo, upload it as an image reference and ask AI to remove the support while adding natural volume. Name the details that must stay the same. Then compare the result against the original before using it in a product listing.

Step 01

Upload one clear garment photo

Choose a front view with the collar, sleeves and full hem visible. Use your own product photo as the reference so the model has the actual garment to work from.

Step 02

Describe the support removal and shape

Edit the starting prompt: remove the hanger or mannequin, add hollow volume, and preserve color, fabric, stitching and proportions. Choose the model and check the displayed credit cost.

Step 03

Generate and compare with the original

Zoom in on buttons, pockets, labels and the inside collar. If a detail changes, refine that part of the prompt or use a clearer source image before downloading.

Step 04

Prepare the listing version

After checking the garment, download the image and apply your catalog crop. Keep front and back views separate, with consistent margins and lighting.

Ghost mannequin examples: shirt, jacket and dress

Compare three AI-created source images and reference-based edits. Try a prompt with its source image, or adapt it for your own garment.

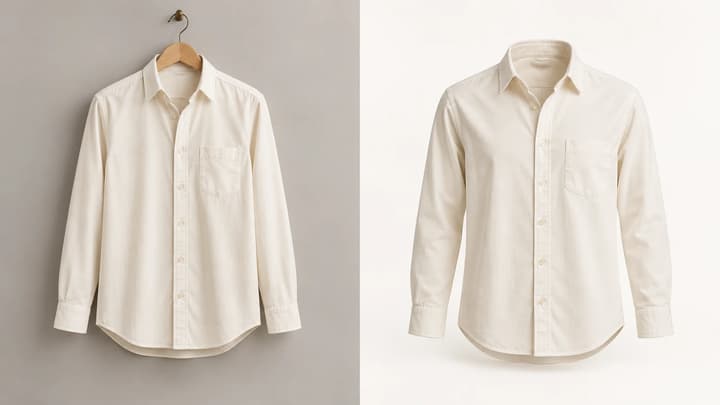
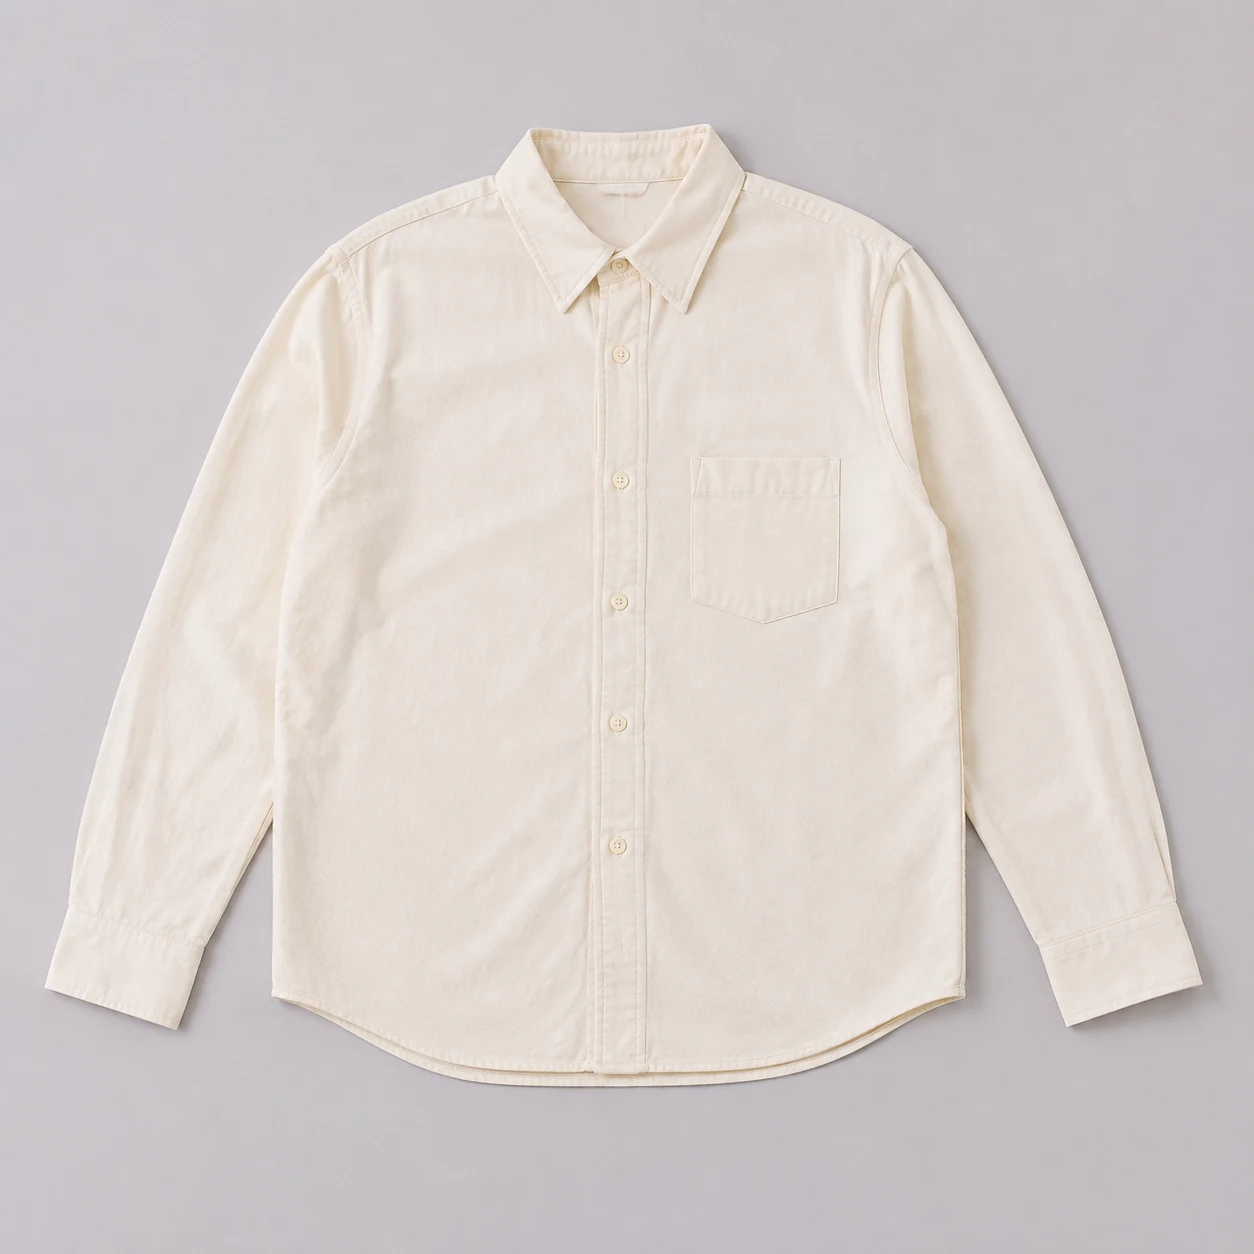
Ivory button-up shirt laid flat on a gray background
Source photo
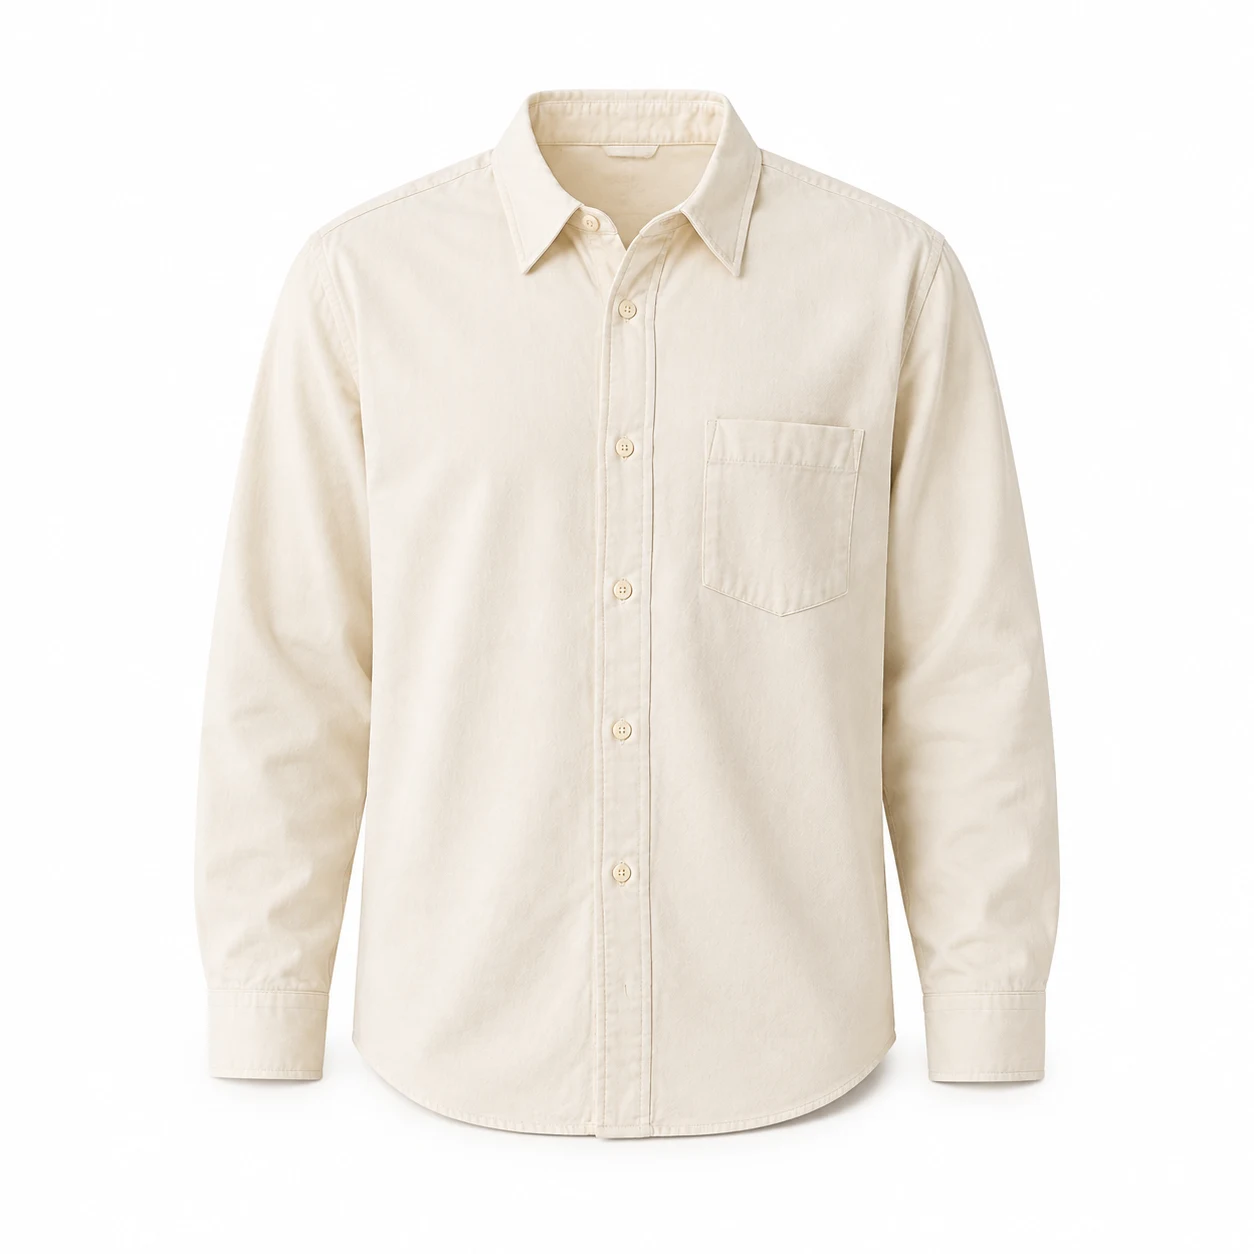
Ivory shirt with a hollow collar and rounded shoulders on white
Ghost mannequin

Flat-lay shirt

Try this example
Prompt

Edit the referenced shirt product photograph into a photorealistic ghost mannequin ecommerce photo of this exact garment. Preserve its original color, fabric, cut, seams, pockets, buttons and proportions. Remove the flat-lay appearance. Give the garment natural hollow three-dimensional volume as if worn by an invisible torso, with rounded shoulders and a clearly open neckline showing the existing inner back fabric. Keep the front view, full hem and all sleeves or straps inside the square frame with generous margins. Plain white background, soft studio light, subtle realistic shadows. Do not add any human body, mannequin, hanger, logos, text, accessories or watermark. Do not invent labels or redesign the garment.
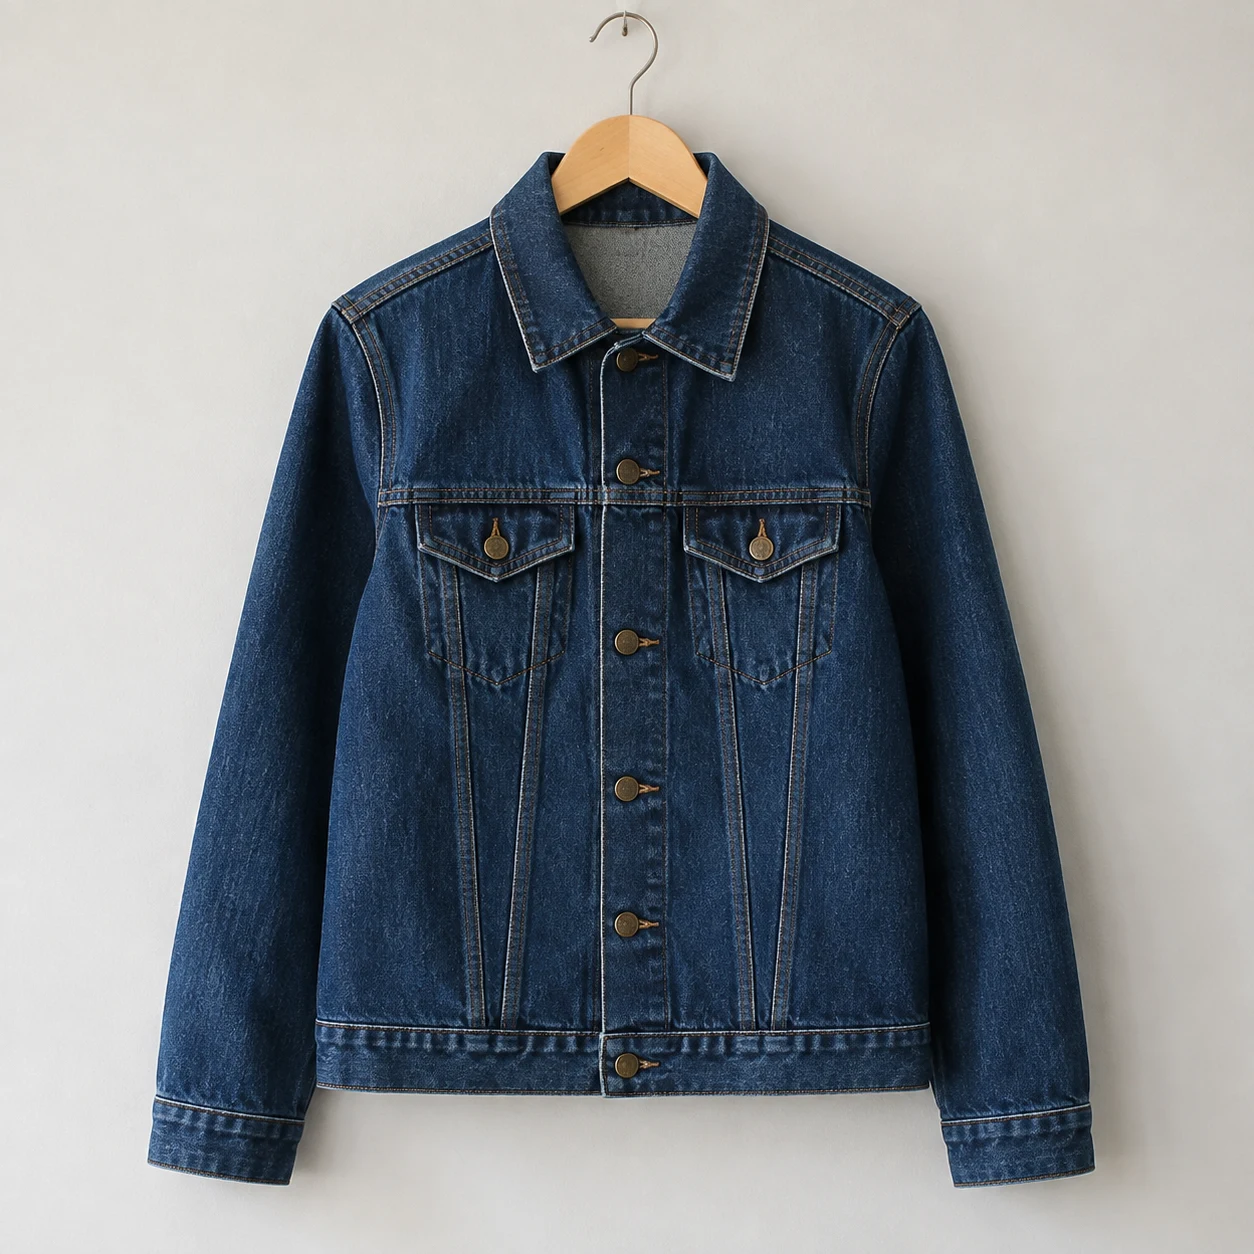
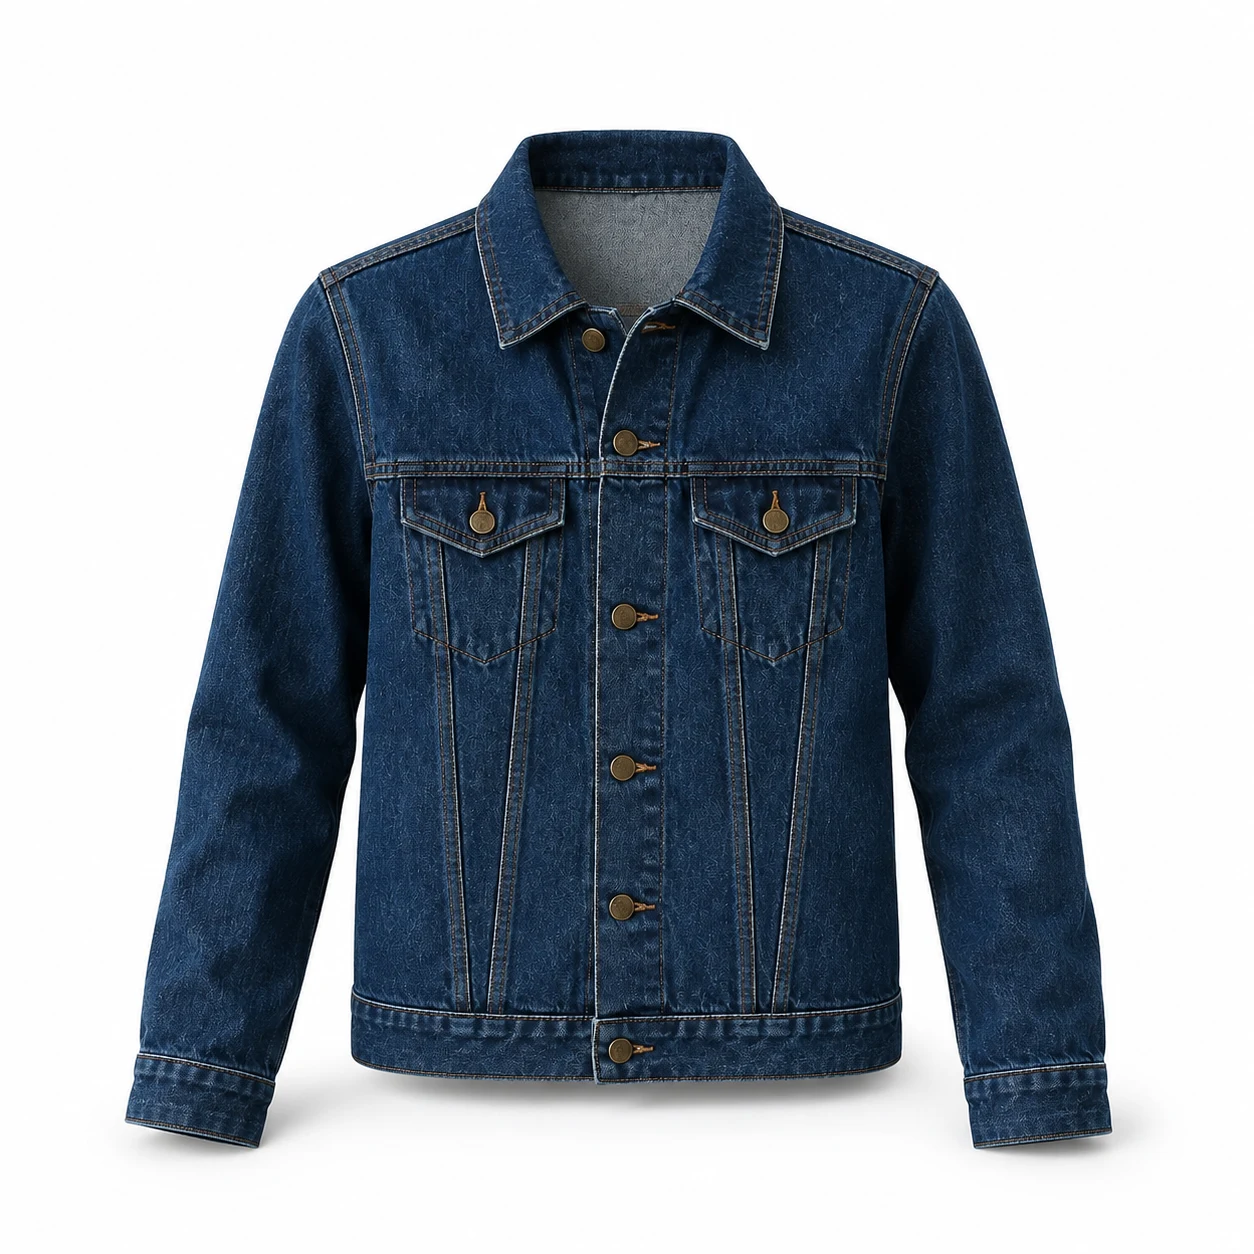
Indigo denim jacket on a wooden hanger
Source photo
Indigo denim jacket with the hanger removed and a hollow neckline
Ghost mannequin

Jacket on a hanger

Try this example
Prompt

Edit the referenced jacket product photograph into a photorealistic ghost mannequin ecommerce photo of this exact garment. Preserve its original color, fabric, cut, seams, pockets, buttons and proportions. Remove the wooden hanger and hook. Give the garment natural hollow three-dimensional volume as if worn by an invisible torso, with rounded shoulders and a clearly open neckline showing the existing inner back fabric. Keep the front view, full hem and all sleeves or straps inside the square frame with generous margins. Plain white background, soft studio light, subtle realistic shadows. Do not add any human body, mannequin, hanger, logos, text, accessories or watermark. Do not invent labels or redesign the garment.
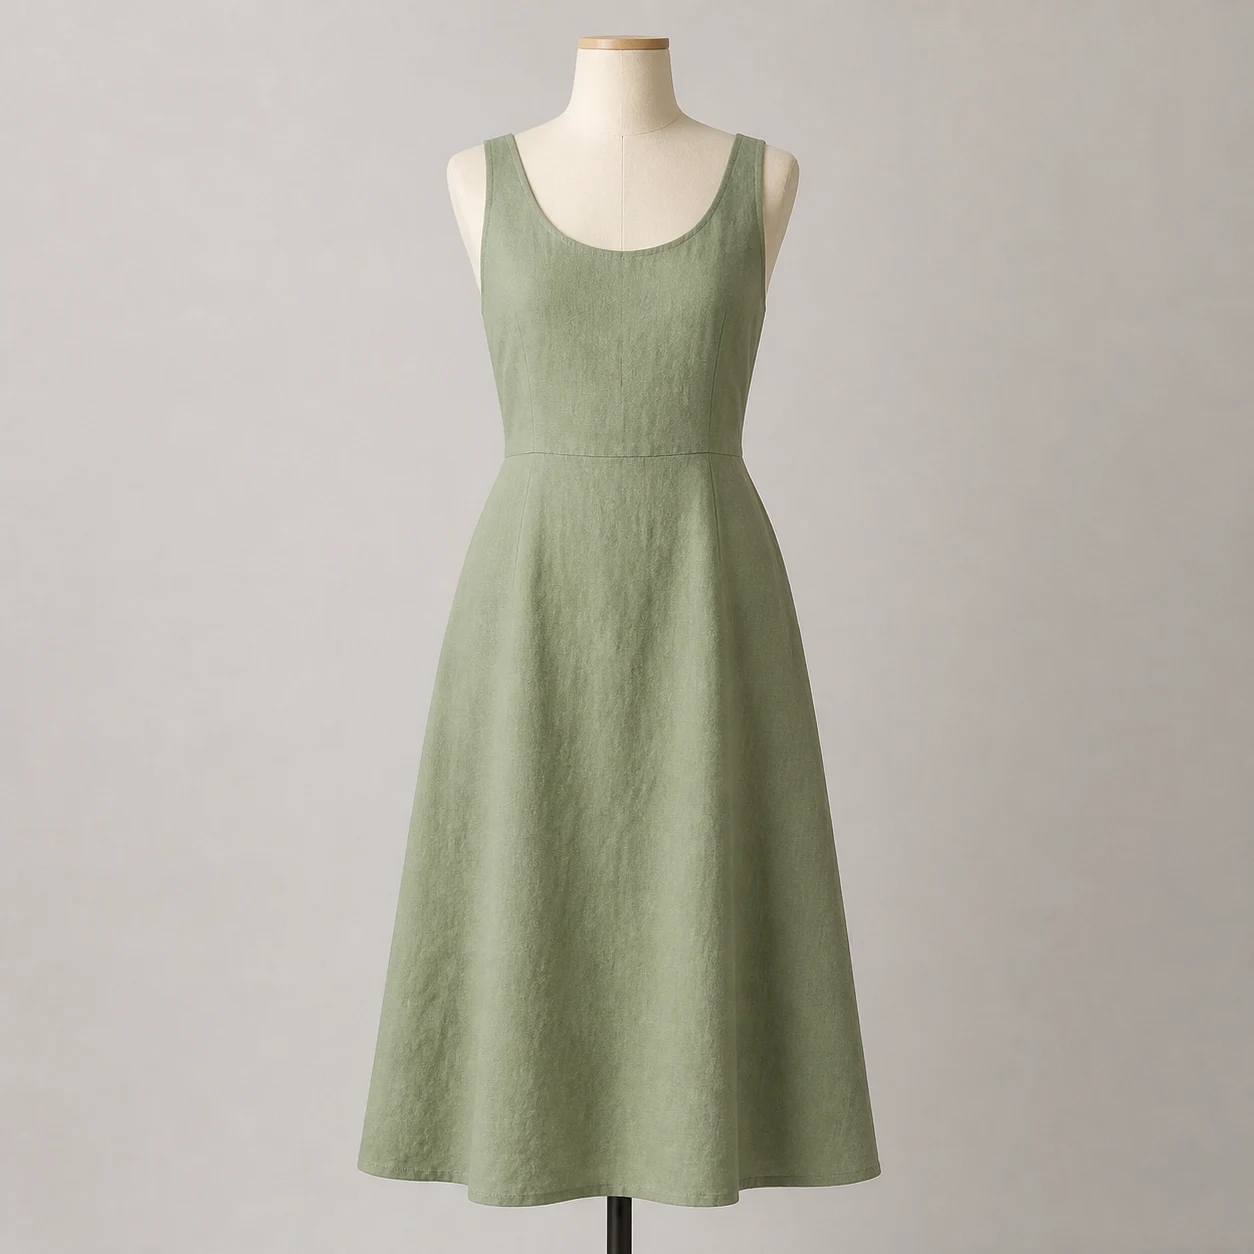
Sage linen dress on a cream dress form with a visible stand
Source photo
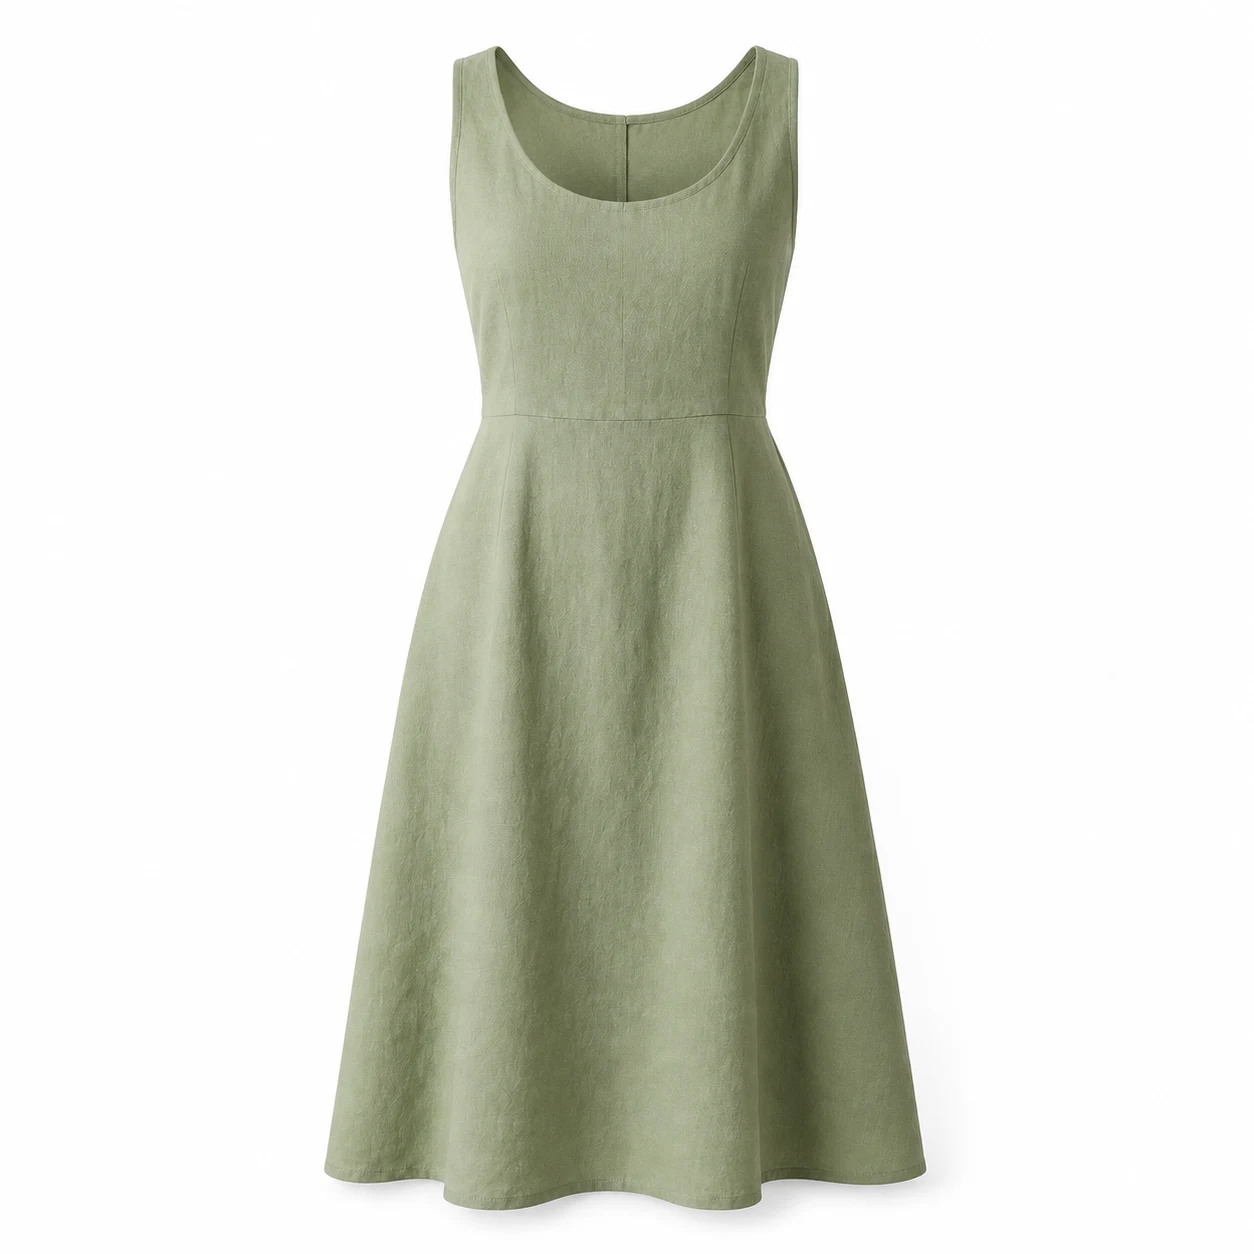
Sage dress with the form and stand removed, showing an empty neckline
Ghost mannequin

Dress on a form

Try this example
Prompt

Edit the referenced dress product photograph into a photorealistic ghost mannequin ecommerce photo of this exact garment. Preserve its original color, fabric, cut, seams, pockets, buttons and proportions. Remove the cream dress form and black stand. Give the garment natural hollow three-dimensional volume as if worn by an invisible torso, with rounded shoulders and a clearly open neckline showing the existing inner back fabric. Keep the front view, full hem and all sleeves or straps inside the square frame with generous margins. Plain white background, soft studio light, subtle realistic shadows. Do not add any human body, mannequin, hanger, logos, text, accessories or watermark. Do not invent labels or redesign the garment.
Refine one detail at a time

Use these follow-up instructions when the first result needs a specific correction.

Collar depth

Keep the garment, color, cut and framing unchanged. Refine only the neckline: create a natural hollow opening with visible inner back fabric and a soft interior shadow. No visible neck, mannequin or hanger.

Use this when the collar looks like a flat cutout. Compare its opening and inner fabric against your references.

Garment detail

Keep the original garment design from the source photo. Restore the original number and position of buttons, pockets and seams. Preserve fabric color and texture. Do not add new fastenings or labels.

Use this when a pocket, fastening or seam drifts. If it is still wrong, supply a closer source photo.

Catalog framing

Keep the reviewed garment unchanged. Show the full front view centered on a plain white background with generous, even margins around the shoulders, sleeves and hem. Preserve the original length and proportions.

Use this after garment details are correct. Leave margins for your final listing crop.

Troubleshoot the first result

Keep the same source and change one instruction so you can judge the difference.

Buttons or pockets change
Name the original count and position
Compare the fastening and stitching at full size.
Collar looks flat
Request a hollow opening with visible inner back fabric
Look for depth without adding a neck or mannequin.
Hem or sleeves get cropped
Request the full garment with wider margins
Keep the original garment length and proportions.
Color or fabric looks wrong
Request the original shade and matte fabric texture
Compare against the source under neutral light.

FAQ

Can I start from a flat-lay or hanger photo?

Yes. Upload a clear photo and specify its starting format. A flat lay needs added volume; a hanger photo also needs the hanger and hook removed. Keep the whole garment in view.

Is this the same as background removal?

No. Background removal isolates the existing silhouette. A ghost mannequin edit also changes garment volume and reconstructs visible interior areas such as the back of a collar.

Will AI preserve every product detail?

It may change small details. Explicitly name the color, buttons, pockets, seams and logos to preserve, then compare the output with your source. A generated view does not establish accurate fit or measurements.

Give your next garment a ghost mannequin look

Start with one clear photo. Keep the garment details specific and compare the first result before making more views.